kdos
Getting started
This chapter takes a newcomer from a clone of the KDOS repository to a running KDOS desktop. It covers building the image, booting it in a virtual machine or from a USB stick, logging in, keeping a live session’s changes, and moving on to an installed system. It assumes a Linux machine with Docker and some familiarity with a shell; nothing about KDOS itself is assumed. If you want to know what KDOS is before you build it, read Why KDOS and How KDOS differs first. The installer has a chapter of its own, Installation.
The chapter follows these steps in order:
- Fetch the upstream sources and build an ISO image on your own machine.
- Boot the image in a virtual machine to see that it works.
- Write the image to a USB stick.
- Boot the stick and log in.
- Optionally, create a persistence store so that a live session keeps its changes.
- Install to a disk with
kinstall. - Try the first commands on the running desktop.
Before you build
The project does not publish an image built from this tree. The releases page of
github.com/kunaldawn/kdos carries the source archive
(the numbered pre-releases sources-1, sources-2 and on, described below) and one ISO from an earlier line of KDOS that
this book does not describe. The system this book describes is one you compile from the repository.
That follows from what KDOS is: a distribution built from source, where every program on the image
was compiled by the build you ran, apart from a short, named list of exceptions: firmware, bootstrap
seeds, compiled font files, data with no other source form and built JavaScript (see
What is not built from source).
How KDOS is built follows the build from git clone to the
finished ISO, and The build system describes its orchestrator in
depth.
Plan for the cost before you start:
| Wall time, first build | Many hours; budget a day or more. Every package is compiled, including GCC several times over and the kernel. The build container uses every thread the host leaves idle; make build KDOS_JOBS=N caps it |
| Disk | About 41.5 GB (38.6 GiB) of upstream source archives, fetched by make fetch. The build tree under build/ needs room of its own, and a complete set of phase snapshots gigabytes more, the tree compressed once plus a layer per phase; its size is not yet measured. Snapshots are optional |
| Network | Needed to clone, to run make fetch, and for the first make build on a machine, which builds its container image from Alpine Linux packages. The compile itself runs with networking switched off |
| Software on your machine | Docker, plus a few small tools listed in the next section. Every compiler runs inside a container |
Later builds are much shorter. The build runs in thirteen phases, stages that each run in order (see The build system); after each one it can save a snapshot of the tree, so a later build can resume from that point. Most changes need only a narrow rebuild of one port or one phase. Developing describes those targeted loops.
What you need
| Need | Used by | Notes |
|---|---|---|
| A Linux machine with Docker | make build |
make build runs docker directly, in privileged mode. The build image carries the whole toolchain |
git, curl, sha256sum |
Cloning, make fetch |
Ordinary downloading happens on your machine |
A C compiler ($CC, default cc) |
make fetch, make fetch-check |
Optional for make fetch, which compiles a small recipe reader on the host. Without a compiler, make fetch hands the whole fetch to a container of its own (Docker or Podman, whichever is on your PATH). make fetch-check has no container fallback |
fuser (from psmisc) |
make build |
Guards the finished ISO against being rewritten while a virtual machine has it open; without fuser the guard is skipped |
qemu-system-x86_64, OVMF firmware at /usr/share/ovmf/OVMF.fd, /dev/kvm |
make run, make rundisk |
Only to boot the result in a virtual machine |
| A USB stick of 32 GB or more, or a BD-R | Booting the image on a machine | Every package is on the medium, so the ISO is about 24 GB (23,853,701,120 bytes on the last measured build). It does not fit a DVD, so optical boot means a BD-R. A published release splits the image into parts of under 2 GiB, about twelve, joined with cat before writing |
| About 56 GB of disk on the target machine | Installing | The installed system is about 53 GB, and the installer refuses a disk smaller than that plus 768 MiB |
The full list, with the tools that only development work needs, is in What a development machine needs.
Build an image
git clone https://github.com/kunaldawn/kdos.git kdos
cd kdos
make fetch
make build
make fetch is the only step that downloads source code. The first make build on a machine also
needs the network, to build its container image from Alpine Linux packages; after that, make build
reads nothing but what the fetch left in the port directories and runs offline.
Fetching the sources
A clone carries the recipes, not the upstream source archives. Each recipe (also called a port: a
directory holding a declarative kpkgbuild file and a build.sh; about 2,000 live under
ports/core/, each on one of 102 subject shelves as ports/core/<shelf>/<name>/, and about two
dozen under src/; see the glossary) names its source files with a
sha256 = line, and make fetch downloads every such file that git does not carry.
Measured across the tree, that is 2,487 file names in 1,993 ports; a further 39 named files, such
as bash’s upstream patches, are committed beside their recipes. Several ports share one archive, so
they are 2,448 distinct files and about 41.5 GB (38.6 GiB); the LLVM tarball alone serves eight
ports. The ports catalogue lists every port by shelf, with the phase that builds it.
For each file, make fetch takes the first copy it finds whose hash matches the recipe: the
download cache under ports/.srccache/, then the KDOS source archive (the sources-<N> pre-releases),
then the upstream URL in the recipe. A verified file is entered in the cache and hard-linked into
each port directory that names it, so switching branches fetches nothing twice. The full lookup
order, the variables that change it and the container that regenerates a vendored dependency
bundle are described in
Where sources come from.
make fetch is safe to re-run: a file already present and verified is not downloaded again.
make fetch-check lists, without using the network, every archived source that is missing or
corrupt, and exits 1 if it finds any. A build started without the fetch fails at the first port
whose archive is absent.
Building
make build builds the container image os-dev from the repository’s Dockerfile (Alpine Linux
with a compiler and build tools), then runs the build orchestrator, kdosbuild, inside it with
--network none. Only the first make build on a machine needs the network, to pull Alpine and
its packages; after that Docker reuses the image and the whole build runs offline.
When make build runs in a terminal, the orchestrator opens a startup picker before it does
anything. Choose start fresh and press Enter to run every phase; the picker also asks whether
to write phase snapshots, and S toggles that. make build BUILD_ARGS=--fresh skips the picker.
The startup picker describes both questions.
The result is one file:
build/iso-build/kdos.iso
make build refuses to start while that ISO is open in another program, for example a virtual
machine started by make run, because the last step rewrites it and a guest reading the old image
would see I/O errors. Stop the virtual machine first, or set ALLOW_ISO_IN_USE=1 to override.
A few variables change what the build produces:
| Variable | Effect |
|---|---|
BUILD_ARGS="…" |
Flags for the orchestrator, such as --fresh, --no-snapshot, --continue-from <phase> or --rebuild <port>. See The build system |
KDOS_ISO_SOURCES=1 |
Copies the ports tree with its fetched sources, src/, script/ and fs/ onto the ISO under sources/, together with a SOURCES stamp that kdos rebuild prints. No rebuild from such a medium has been run through every phase; see KDOS can build KDOS |
KDOS_PACK_KDOS=1 |
Also packs the finished system as a base pack named kdos, written to build/kdos-base/kdos.kpack and carried on the medium under packs/ |
The graphical applications KDOS ports natively, from Firefox ESR and LibreOffice to KiCad and GNU Radio, are compiled by the same build and installed into the image like any other port. For software that is not ported, the ISO ships the catalogue, which describes each application as a stack of container image layers built from Debian packages; the machine that wants one builds it in a rootless Podman container. See Applications for both, and Packs and boxes for the container format.
When a build fails, read the failing step’s log under build/logs/ and check
Build troubleshooting, which lists the recurring
failures by symptom.
Try it in a virtual machine first
make run        # boot the ISO; creates build/kdos.qcow2 as a blank sparse 96 GB disk if missing
make rundisk    # boot that disk instead, once you have installed to it
Both targets give the guest 4 GB of memory, one virtual CPU per host thread, UEFI firmware (OVMF),
an Intel HDA sound card when the host has an audio backend QEMU can use, and a user-mode network.
make run also attaches the ISO as a CD-ROM and a USB tablet, so the pointer follows the host’s.
The guest’s serial console is connected to the terminal you ran make from.
The targets pass -enable-kvm -cpu host to QEMU. The Makefile only warns when /dev/kvm is
missing, but QEMU cannot start with those options and no KVM, so treat /dev/kvm as required.
The screen comes up at 1920x1080. Set KDOS_RES to change it, for example
make run KDOS_RES=2560x1440.
make run attaches a plain virtio-vga adapter, on which the compositor falls back to software
rendering. The desktop works, but the phosphor pass, the compositor’s CRT-style post-processing
shader, does not run: the compositor applies it only on its GLES2 renderer. make run-hw boots
the ISO, and make rundisk-hw the disk, through a containerised QEMU with virgl on your GPU, which
is the configuration where the shader is on. It needs Docker with the NVIDIA Container Toolkit and
/dev/udmabuf. See The phosphor pass and
Running the result.
Write the medium
The ISO is a hybrid image. Write it to a USB stick as a raw byte stream, replacing /dev/sdX with
your stick. Everything on that device is lost:
sudo dd if=build/iso-build/kdos.iso of=/dev/sdX bs=4M status=progress conv=fsync
The stick must hold 32 GB or more. The same image boots four ways: BIOS and UEFI, from an optical
drive (a BD-R; the image does not fit a DVD) and from a stick. It carries
two El Torito boot records for optical drives, one for each firmware, and for a stick a partition
table with an EFI System Partition plus BIOS boot code in its first sector, so the dd above is the
whole job and there is no separate step to make the stick bootable.
Once you have one working stick, a running KDOS system can copy itself to another without a second computer:
sudo kdos clone            # list the devices it may write to
sudo kdos clone /dev/sdb   # copy this boot medium onto /dev/sdb
kdos clone takes the image’s length from the image itself rather than from the device, so a
small image on a large stick copies only the image. It refuses the medium it booted from and any
device that is mounted or named in /etc/fstab. When f3probe is installed it tests the target
for a counterfeit capacity first, and after the copy it verifies the target by reading it back with
the page cache dropped. --yes skips the confirmation, --no-probe and --no-verify skip the two
checks, and --source <path> clones an image file or another device instead of the boot medium.
See Copying and rebuilding the medium.
Boot
KDOS boots on BIOS and UEFI alike through the Limine bootloader, so the menu looks the same either way. Select the stick in your firmware’s boot menu and the KDOS menu appears.
The menu counts down for ten seconds and then boots the first entry, so an ordinary boot needs no keystroke. Press any key during the countdown to stop it; the menu then waits for you to choose:
| Entry | Boots |
|---|---|
| KDOS Live | The normal live session |
| KDOS Live (clean session) | The same, ignoring the persistence store for one boot (the kernel argument nopersist) |
| KDOS Live (verbose) | The same, with every kernel message on the console (loglevel=7 in place of quiet loglevel=3) |
| Memory Test (memtest86+) | memtest86+ instead of the kernel. UEFI only: the entry is hidden on a BIOS boot, and absent from an image built without the memtest86+ port |
Every KDOS Live entry passes console=tty0 console=ttyS0, so kernel messages also reach a serial
line.
Reading the splash
What you see during boot is the KDOS splash: a CRT power-on animation drawn directly to the framebuffer, with a progress bar and the name of each stage as it starts. The initramfs, the small early filesystem the kernel starts from, runs the first stages; the service scripts of the real system run the rest. If a boot stops, the last stage named tells you where:
| Stage | If it stops here |
|---|---|
DEVICE MANAGER |
udev did not come up |
RAID |
Software RAID assembly. Shown only when mdadm is in the initramfs; finding no array is normal |
FILESYSTEM MODULES |
Loads the loop, ISO 9660, squashfs and overlay modules. This stage never stops the boot itself: a module it could not load shows up as a failure at SYSTEM IMAGE or OVERLAY ROOT |
BOOT SLOT |
An installed system reads its boot state from the EFI System Partition. It waits up to ten seconds for that partition, and when it cannot read the state it keeps the root named on the kernel command line, so this stage does not stop the boot |
VOLUME GROUPS |
An LVM volume group would not activate. Not fatal by itself; the root lookup says whether the root was in it |
UNLOCKING |
The encrypted root’s passphrase was refused three times |
ROOT DEVICE |
An installed system’s root partition did not appear within ten seconds |
BOOT MEDIA |
No device carrying the KDOS image appeared within ten seconds |
SYSTEM IMAGE |
The system image on the medium would not mount |
MOUNTING ROOT, OVERLAY ROOT |
The installed root filesystem, or the live overlay, would not mount |
SWITCHING ROOT |
The handover to the real root failed |
MOUNTING FILESYSTEMS onward |
The boot is in the service scripts, and the failing service names itself |
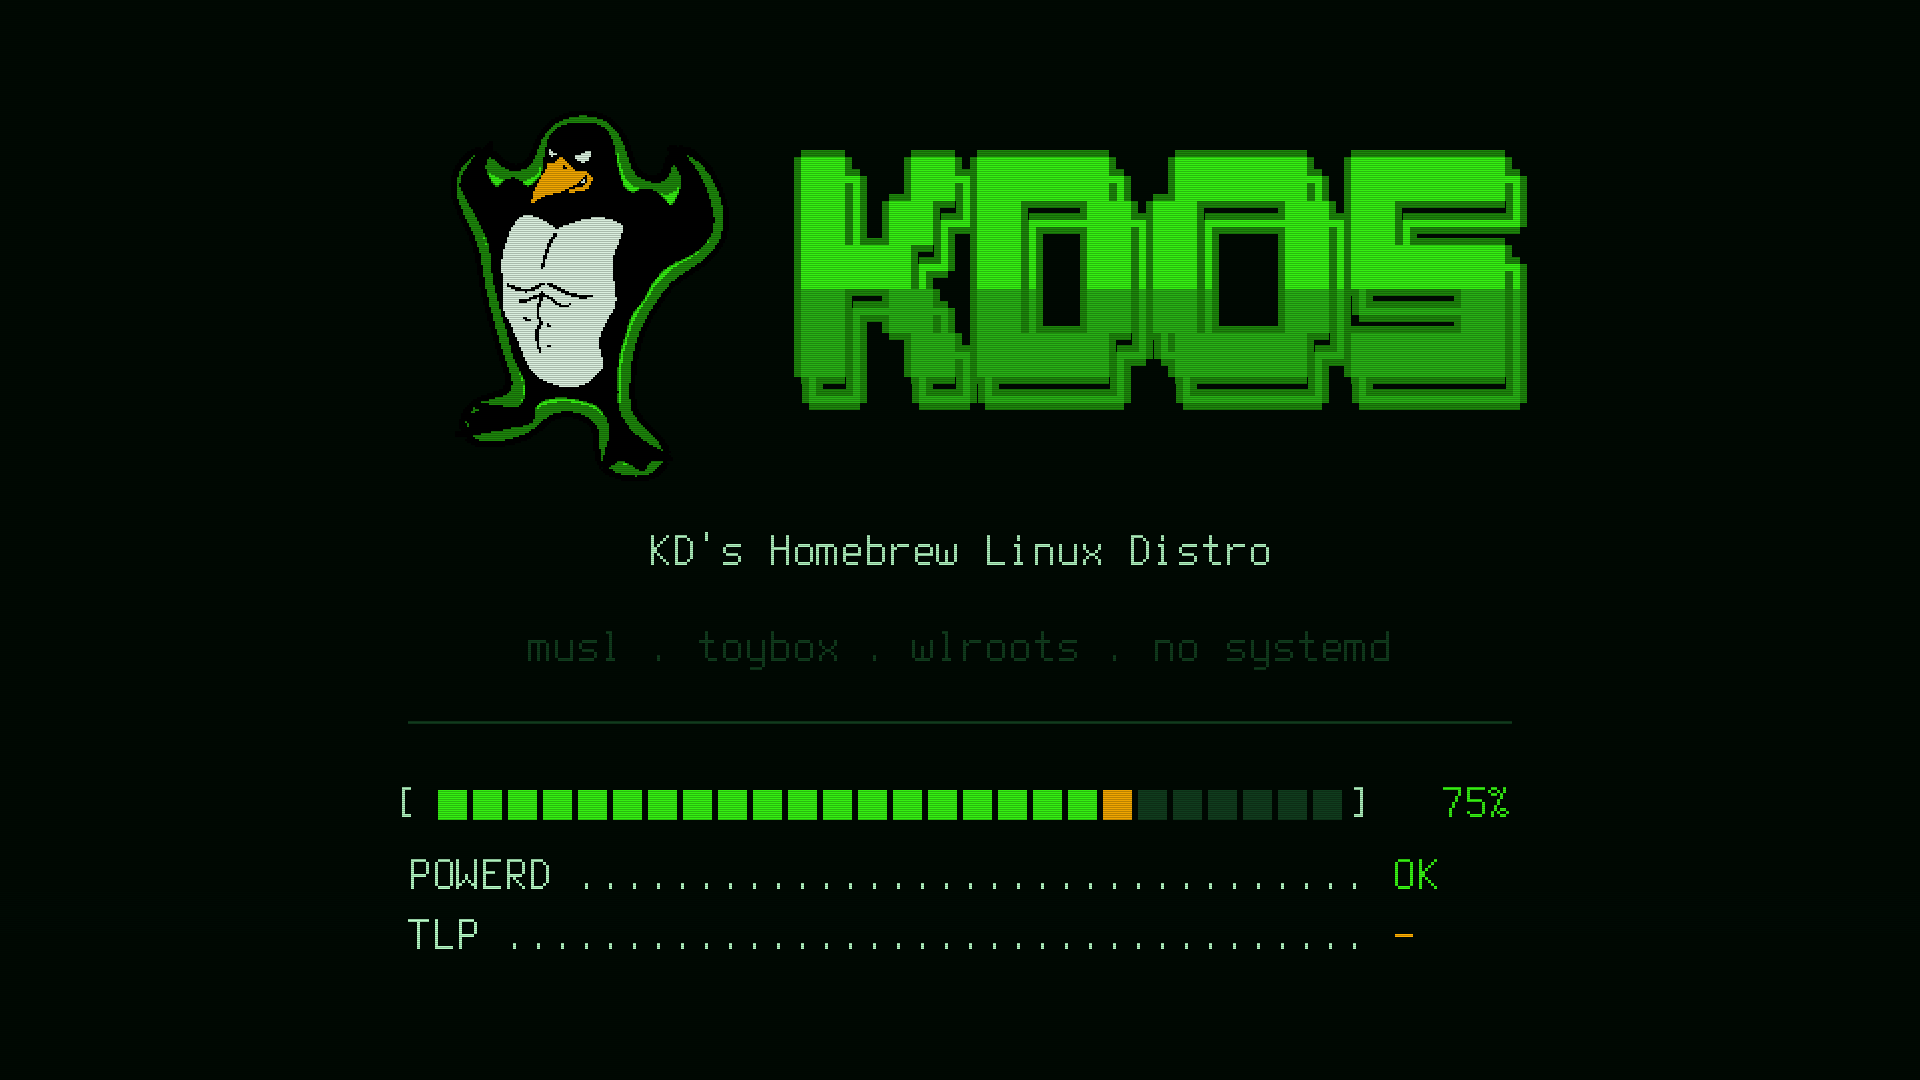
When the initramfs cannot continue, it shows the reason on the splash, hands the screen back and
leaves you at a shell on the first console (tty1), with the reason printed above it, rather than
rebooting, so you can look around. The serial line gets a shell too, beside the full boot log.
The progress bar stops one segment short of full until the splash is dismissed, so a boot never
shows 100% before it has finished. Boot and init
describes what happens at each stage.
Log in
The image ships one human account:
| User name | kdos |
| Password | kdos |
| Groups | wheel (which grants sudo), plus tty, dialout, audio, video, cdrom, render, input, kvm, users, seat and lpadmin |
On the live image the root password is also kdos. The installer asks for your
own user name and password, locks the root account by default, and never carries the live image’s
root password over.
The consoles are laid out like this:
| Console | What it gives you |
|---|---|
tty1 |
The desktop. On the live medium it logs in as kdos without asking; an installed system asks for a password unless it was installed with automatic login (see Installation) |
tty2 |
An ordinary login prompt: the recovery console |
ttyS0 |
On the live medium, root logged in on the serial line, with no password. An installed system asks for a login there |
At a text console, switch with Alt+F1 and Alt+F2. From the desktop, Ctrl+Alt+F2 reaches the
recovery console, and Alt+F1 returns to the desktop.
How the desktop starts
KDOS has no display manager and no graphical greeter. On tty1, kdos-getty loads the console
font and the sixteen console colours of the current accent (the colour scheme the whole session
is tinted with; see Theming), then hands over to kdos-login, which starts
agetty and logs in the account named by autologin in /etc/kdos/login.conf without asking for
a password. The login shell’s ~/.bash_profile then starts the session with kdos-desktop, on
tty1 and nowhere else. The session is not started with exec, so if it fails to come up you are
left at a shell on tty1 rather than at a black screen, and the machine can still be repaired.
tty2 is a plain login whatever tty1 does.
To be asked for a password on tty1 instead, comment out the autologin line in
/etc/kdos/login.conf:
# autologin = kdos
Every console login and every new terminal window opens with the KDOS banner, drawn one raster
line at a time. It appears once per terminal: a nested shell, or a shell inside a container, does
not repeat it. Any keypress skips the rest of the animation, and setting
KDOS_NO_ANIM prints it without one.
The text console uses the KDOS console font, ter-kdos32n, at 16x32 pixels. It has 512 glyphs,
which is why parts of the system restrict themselves to a small set of symbols when they draw on a
console; see The design language.
Keep what you change
A live session’s changes are held in RAM and are gone when the machine powers off. To keep them,
create a persistence store: an ext4 filesystem labelled KDOS_PERSIST, which the initramfs uses
as the writable layer of the live system instead of RAM.
sudo kdos persist create            # on the stick you booted from
sudo kdos persist create /dev/sdb   # on another device
kdos persist                        # does a store exist, and is this session using it?
kdos persist create adds one partition in the free space after the last partition on the device,
by default the stick you booted from. Nothing already on the device is moved or rewritten. It asks
you to type yes before it writes; --yes skips the question. It refuses to make a second store
when one already exists.
The store is found by its label rather than by a device name, so it can equally live on a second
stick or an internal disk, and it keeps working when USB devices come up in a different order.
kdos persist create makes it ext4. A store made by hand may use another Linux filesystem, but not
FAT, exFAT or NTFS: overlayfs cannot use them as its writable layer, and the initramfs refuses such
a store by name.
A new store is used from the next boot, not the one that created it; kdos persist reports
whether the running session is writing to it. If a change ever stops the desktop coming up, the
KDOS Live (clean session) menu entry ignores the store for one boot without deleting it.
Install to disk
A live session is enough to try the desktop, and applications from the catalogue install there
too, but it keeps less of what they write. On a live session the home directory sits on the boot
overlay. The container engine’s storage is pinned to fuse-overlayfs, which can stack its layers
on that overlay, so a catalogue install works; what it builds is written under $HOME, held in
memory and lost at power-off unless the session has a persistence store. A box, the rootless
container an application runs in (see Packs and boxes),
composed from an imported pack is worse off: the kernel will not stack its writable layer on the
overlay, so that layer is always a tmpfs, persistence store or not (see
A live session cannot create a persistent box).
An installed system keeps both. It also boots faster, and it can be set up for A/B
updates: two root partitions, where an update is written to the idle one and a boot that fails
returns to the one known to work (see
A/B slot selection).
sudo kinstall
The installer partitions a disk, copies the system, writes the bootloader, creates your account and offers groups of applications. The installer’s import and network routes for applications install them into the live session rather than onto the new disk, so the installed machine never sees them; this is a known defect (see Applications imported or built during an install stay in the live session). Only a recorded choice reaches the new disk. To get applications onto the installed machine, install with no network and no exported set attached, so that the installer records the choice, or install them from the store after the first login (see Installation, 8. Applications). The installer is described in full in Installation, and the program itself in kinstall.
First things to try
Open a terminal with Super+Return (the default terminal is foot) and run:
kdos help                # the system's commands, and where each kind of software lives
kdos doctor              # checks for the things that commonly break on this system
kdos status              # packages, containers and exported applications
kdos app list --all      # the application catalogue on your medium
kdos theme amber         # retint the entire session, live
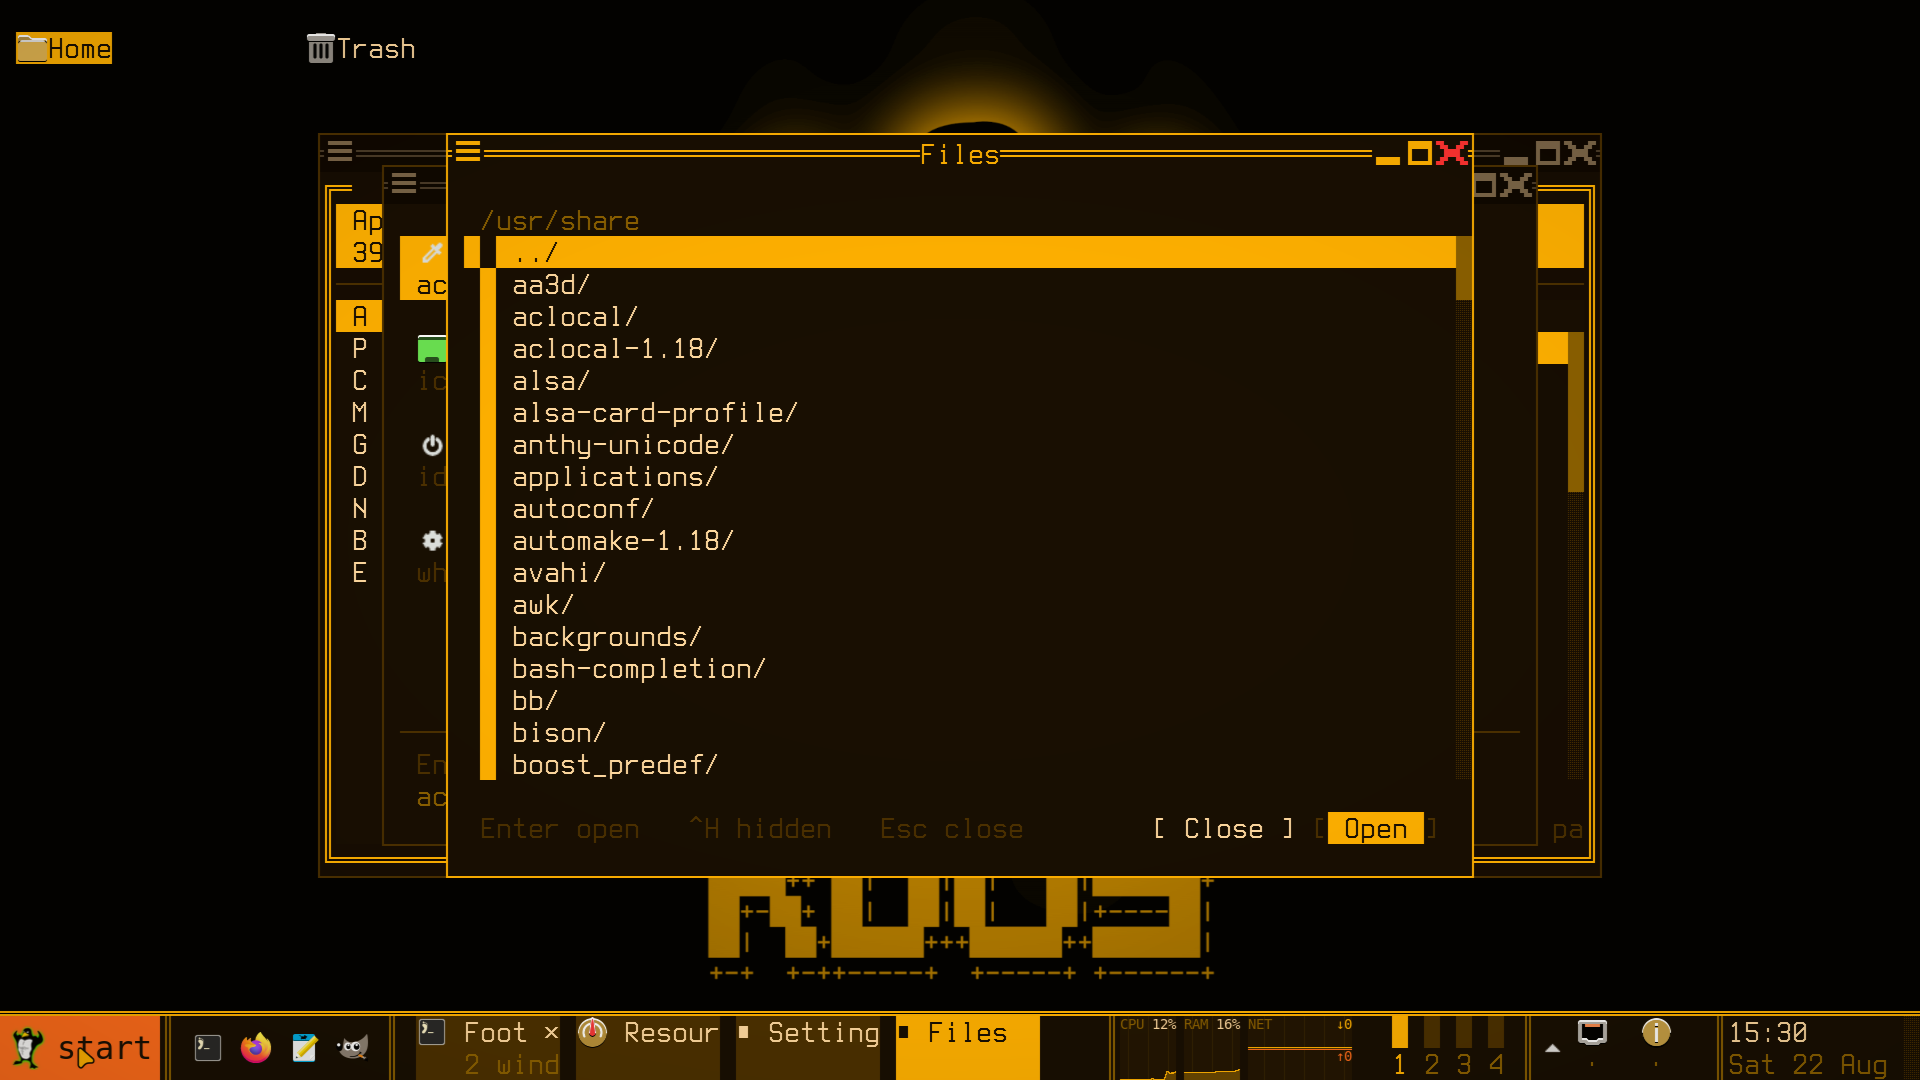
kdos theme amber shows the desktop’s colour system at work. The panel, the desktop icons, the
window frames, the wallpaper and the phosphor shader all change colour at once, with nothing
restarted. kdos theme bone restores the default, and Super+Ctrl+Shift+Space opens a picker that
previews each accent as you move over it. Theming lists all eight accents.
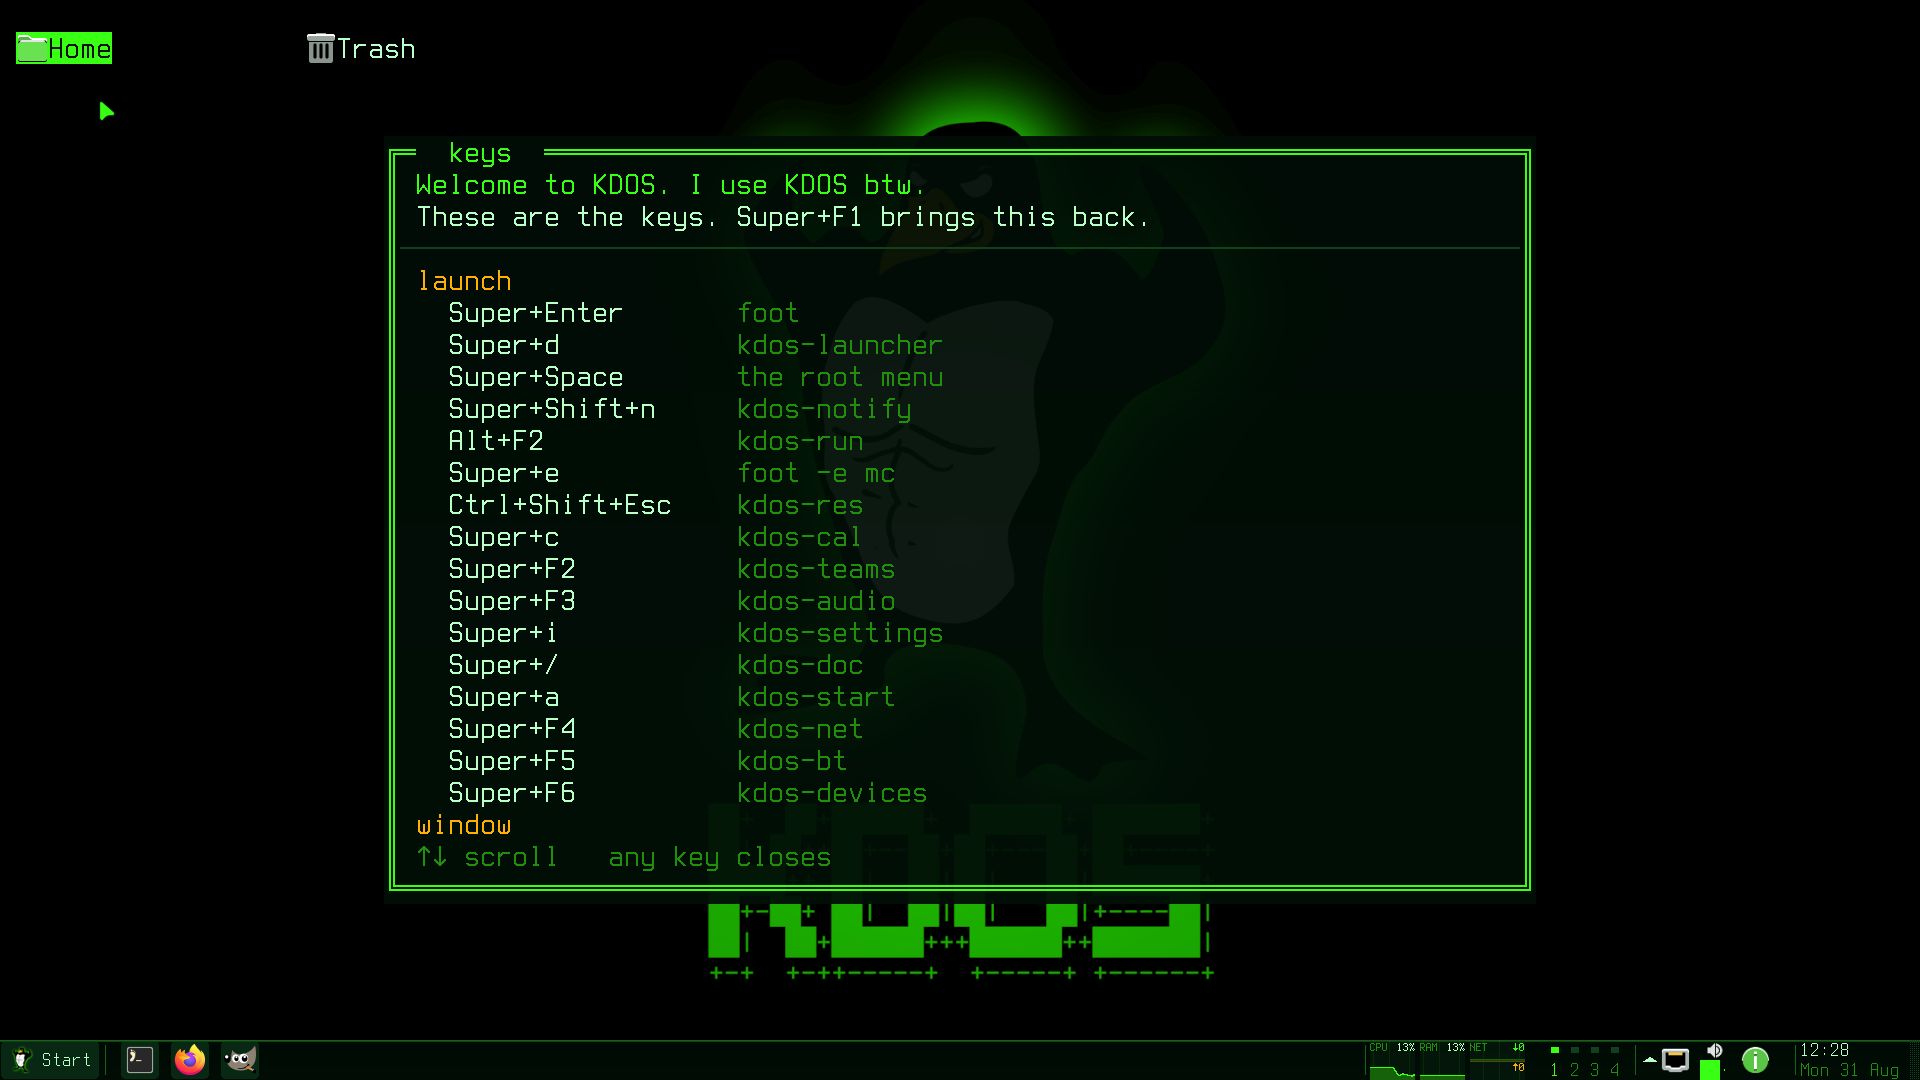
The keybinding card above opens by itself on your first login. Super+F1 opens it again at any
time; it is generated from the compositor’s own key bindings, so it matches the bindings in force.
When the installer recorded your choice of applications, which it does when the machine has no
network and no exported set during the install, or when an import or a build fails, your first
session shows a notification saying they are ready to install rather than starting a long build
unannounced. Run
kdos app install --pending when you are ready, or open the application store, kdos-store, from
the Start menu (see Applications).
See also
- Installation: the installer, page by page
- The desktop: the panel, menus, windows and keybindings
- Applications: the catalogue, boxes and installing applications
- Administration: services, networking, hardware and updates
- How KDOS is built: what
make builddoes, phase by phase - Developing: build targets and the fast iteration loops
- Boot and init: what each boot stage does
Part II — Using KDOS, chapter 5. Previous: 4. Decisions · Contents · Next: 6. Installation